Convenient visual-graphical shell (IDE) for uLisp ESP8266 and ESP32


#1

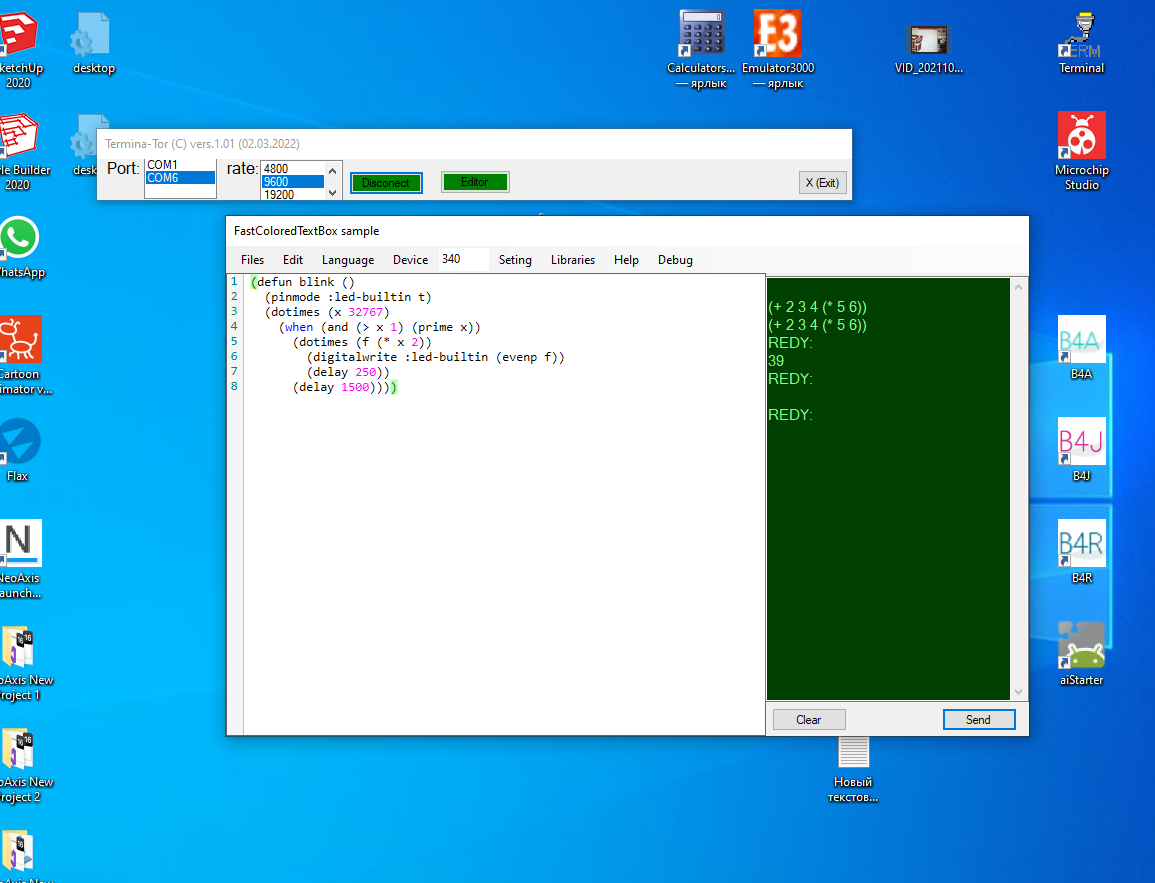
Community gift IDE for uLisp ESP8266 and ESP32 is a complete editor with code highlighting, debugger and breakpoints, Lisp code uploading tools and built-in Lisp file system.

WHAT IS IT FOR:
_ Programming the Internet of Things on Arduino (C++) is very difficult. This is a titanic work, because. the language itself is ancient and not logical, and there is no real debugger._
_ Therefore, uLisp is an ideal tool for quickly creating not very complex and medium complexity projects for the Internet of Things and other useful devices._
However, there is still no good debugger and convenient modern editor with code highlights. In addition, you need a variety of tools, for example, to create your own libraries, so that uLisp becomes not only a hobby, but also a tool for many.
_ This has been overcome by us, now you have everything as in the most modern languages ​​and tools._

Lisp itself is white, with the kind permission of the author, slightly reworked to work with this IDE.
https://drive.google.com/file/d/1tCZYiTv89ZPC77SCiY9Tgw8VuSx54373/view?usp=sharing

the original uLisp will not fully work with the IDE.

BUT I WANT TO USE IT FOR ANOTHER BOARD, WHAT SHOULD I DO? Theoretically, the IDE will work with any uLisp via a USB tail. Tooltip, syntax coloring and communication (through the right green terminal) will work.
However, the debugging and file system functions cannot work. In addition, if there are other incidents, just let us know.

Attention: In the archive there is a folder with the source code of the Lisp version for ESP boards. As well as the shell itself (IDE).
No IDE installation is required. You simply copy the files and run the application.
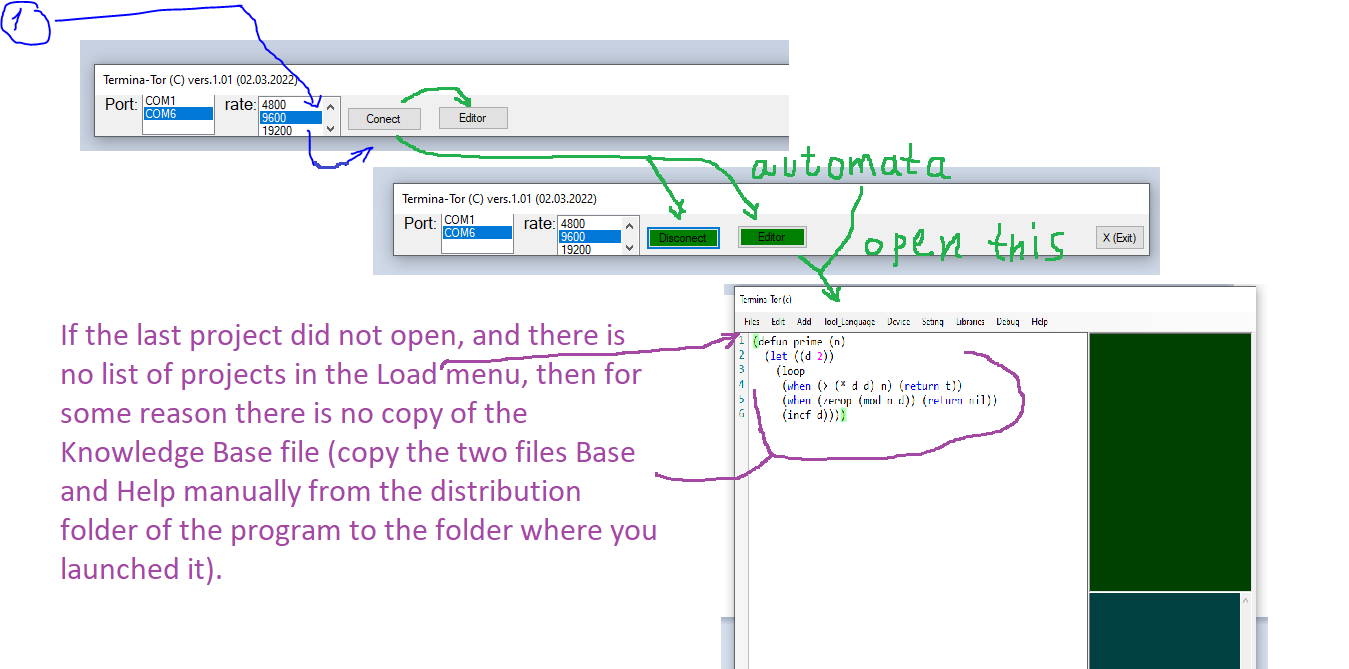
You must understand that two important companion files ensure the safety of all your further developments in the library, as well as your version of the help system. This is a database file for storing projects and a help database.
They should always be in the IDE folder.
You can understand and edit the help system and the tooltip system directly from the IDE itself.
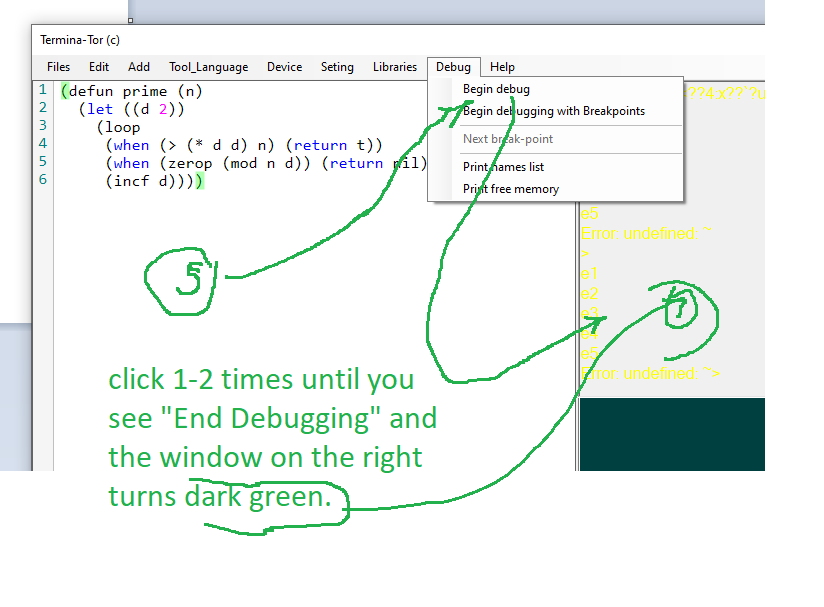
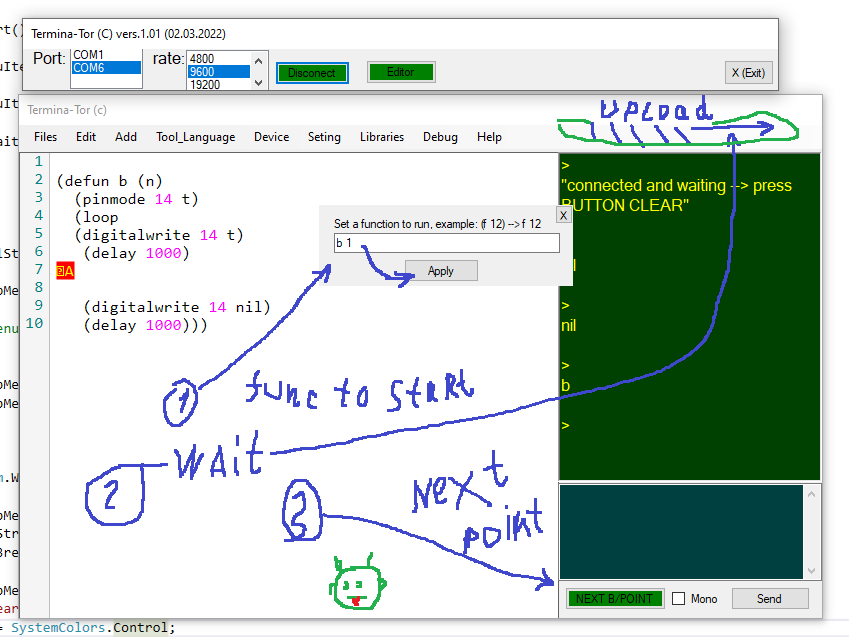
DEBUGER & break-points:

Warning: When compiling this version of Lisp, you must set your chip’s internal file system mode.

This lisp allows you to store up to 4000 small files, including lisp files and auto timer task files, right on board your board. Without connecting additional hardware circuits.

https://drive.google.com/file/d/1tCZYiTv89ZPC77SCiY9Tgw8VuSx54373/view?usp=sharing

The capabilities of this version include automatic operation through a standard wifi terminal, 8 timers that launch any functions or tasks described in files after a time from 1 second to 40 years, and a specified number of repetitions.
It also includes the function of executing a special file for setting contacts and, timers and any other actions, at the time of each launch of uLisp.
There is a complete list of operating system commands on board.
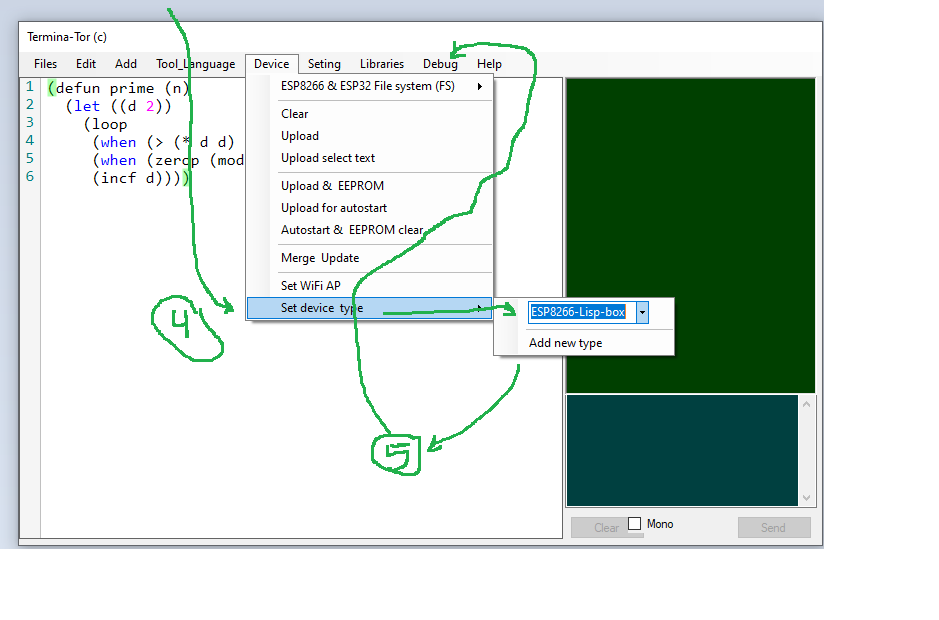
All features are managed and configured using a graphical IDE.

ADD FUNCTIONS (see help)
Version 27.04.2022
add: “SHIFT” + mouse-LEFT == mouse-RIGHT - open edit menu

add: functions in ( see : help – system functions):


filelist

filesave

fileload

filedelete

sysexec

timer

timerloc

interrup

detachinterrupt

locinterrupt

wifiterminfl


#2


#3

This version of uLisp has been expanded with the kind permission of its author.
It is specifically designed to create pragmatic Internet of things, smart home and various robots.
For the convenience of work, a full-fledged interactive Environment for editing and debugging Lisp code has been created.

Starting to work:
You must compile the attached file for your ESP8266 or ESP32 board in the Arduino IDE.
The board of the ESP series has an internal file system (FS) that few of the ardruiners know about. This allows you to store up to 3 megabytes of useful information directly on the board without resorting to additional hardware modules.
However, you must configure your Arduino IDE to compile the sketch along with the file system (FS).
Then please from the Tools menu copy the image file located in the Data folder next to your sketch directly to your board (ESP module).
Now please read the following carefully:

This uLisp initially, when you turn on the power or the reset button, gives you only 20 seconds of connecting via the USB terminal (monitor) or IDE.
Then it automatically switches to WiFi hotspot mode at 192.168.19.2
point name: ULISP_TERM
Password: PL12345678
Now you can no longer connect via USB, but you can connect from an Android or iPhone phone, through a regular text terminal. (Choose the encoding mode R AW ).

When you have managed to connect to the IDE (in 20 seconds), you can change this time, the name of the Access Point and the Password, as well as cancel this automatic start of Wifi, through the menu of the IDE Device - WIFI_Access Settings

You can also edit the file in the data folder in the Arduino IDE. But this is highly undesirable.

I started, what’s next?

You simply run the program from the IDE folder with the comic name “Termina-Tor”.

Your next steps are:
Have you already connected the USB cable? Fine.
1.Press reset or pull the USB cord to have 20 seconds again.
2. Select the port (com port) and port speed (usually 9600).
3. Press the “connect” button and wait for it to turn green. If the button turns red, then you have some problems with the choice or operation of the port, speed, or with the board itself. Possibly with a USB cable.
4. When the “connect” button turns green, it will automatically open the main window of our IDE (Code Editor).

  1. Please wait a few seconds without doing anything, until the system checks the connection itself and prints in the right green window the message “I’m connected. Everything works. Please delete this message”
  2. Now you have to enter the “Device” menu - board selection, and specify your real board. Usually this is ESP8266 - Lisp.

WELL! Everything is ready to start work.
BASIC knowledge:
You must understand that the IDE stores everything in the Knowledge Base (it’s one file next to it in the same folder). Therefore, even if you clicked “Save” or “Create”. then real saving will happen only when (and only then!) when you close the work with the IDE button (exit).
Before that, everything is stored in the RAM of the computer.

Your new version of uLisp allows you to perform the operations necessary for real-time control:

  1. You can assign up to 8 timers that are independent of what the program is doing. Each timer has a string (up to 24 characters) to describe the function name or filename to be executed.
    You can also set a constant repetition or a certain number of repetitions in a time interval from 1 second to 40 years. Time is calculated in seconds.
    When the timer calls a file (from the internal FS), then only you decide what should be there. It’s just a plain text file, just like you type from the terminal in a Lisp dialog. Therefore, you can fantasize about the goals and commands of this timer completely freely.

  2. This version of uLispa also has a special file for starting a certain number of initial tasks. The file is called “StartUlsp” It’s not originally in the board files, but you can create it.
    Then you need to go to the Start settings menu (where you set up the access yearning) and select the “run the start file” checkbox.
    What can be in this file?
    He will describe there his timers, his board contact settings, and those actions that need to be performed only once.
    It is very comfortable!
    You save the memory of your Lisp.
    Commands called from files don’t take up Lisp’s memory!

Note: Each file is only 512 test characters (one screen per IDE). But it is possible to call several short files in succession from one file.

  1. You guessed it, of course, that this Lisp works with interrupts from external pins.
    You can assign up to 4 of these interrupts.
    The action format is similar to the timer action format.
    When the interrupt is triggered, the instruction described in its assignment will become active. It can be a Lisp action, a function call with a parameter, or a file call with instructions, and even an entire task described in Lisp text.

  2. You can also call any files for execution with a special “systemcall” command. This will immediately activate without complex manipulations.
    CONTINUATION…


#4

Continuation:
We have made sure that you are comfortable and understandable.
much better than working only from the terminal text line.
Now everything you write in our smart editor brings up a tooltip from their knowledge base “Help”.
For example, you can start a parenthesis and get the second one automatically.
When you select an already existing bracket, the editor automatically shows you its real pair.
And if it doesn’t find the matching parenthesis, then you should think of an error.

Please note that on the “Help” page you can edit and supplement the help information yourself. And everything at once will be used for automatic hints in the IDE.

As soon as you start writing something in the editor, it will immediately offer you all the options for automatic completion of the function name.
And if you hover and hold the mouse cursor on the name of a function in the text of a Lisp program, then in a second a brief hint will pop up (a description of the meaning and a sample syntax).

For convenience, you have the “Add” menu in which you can select templates for any function. You can do this even if you don’t know, because everything in the select list is sorted by context.
Note (and enjoy!) that when you click once on a function to select it, you’ll get a description on the right.
And if you clicked with a double whip, then the editor will insert it into your program.

When you bring a mouse to any button or menu item in our IDE, a hint soon pops up - what does it do for you.

PLEASE ask questions and report bugs.

We want you to know that THIS was developed by a group of schoolchildren and students from an ordinary school circle (amateur club).
We did this for our experiments with toys, robots and laser devices. Therefore, we tried very hard to do everything in an adult way)))
HOWEVER, YOUR ADVICE, CRITIQUE, possibly PARTICIPATION will help bring this tiny project to real use more than study and a toy.
We will be grateful to everyone who wants to cooperate.

FUTURE PLANS:
In the near future, a graphical WEB interface designer and additions to uLisp will be made that will make it very easy to create beautiful control panels for your Internet of things that work via WiFi phone or tablet.