The LispBox - self-contained Lisp computer with Teensy 4.1


#1

Introducing the LispBox:

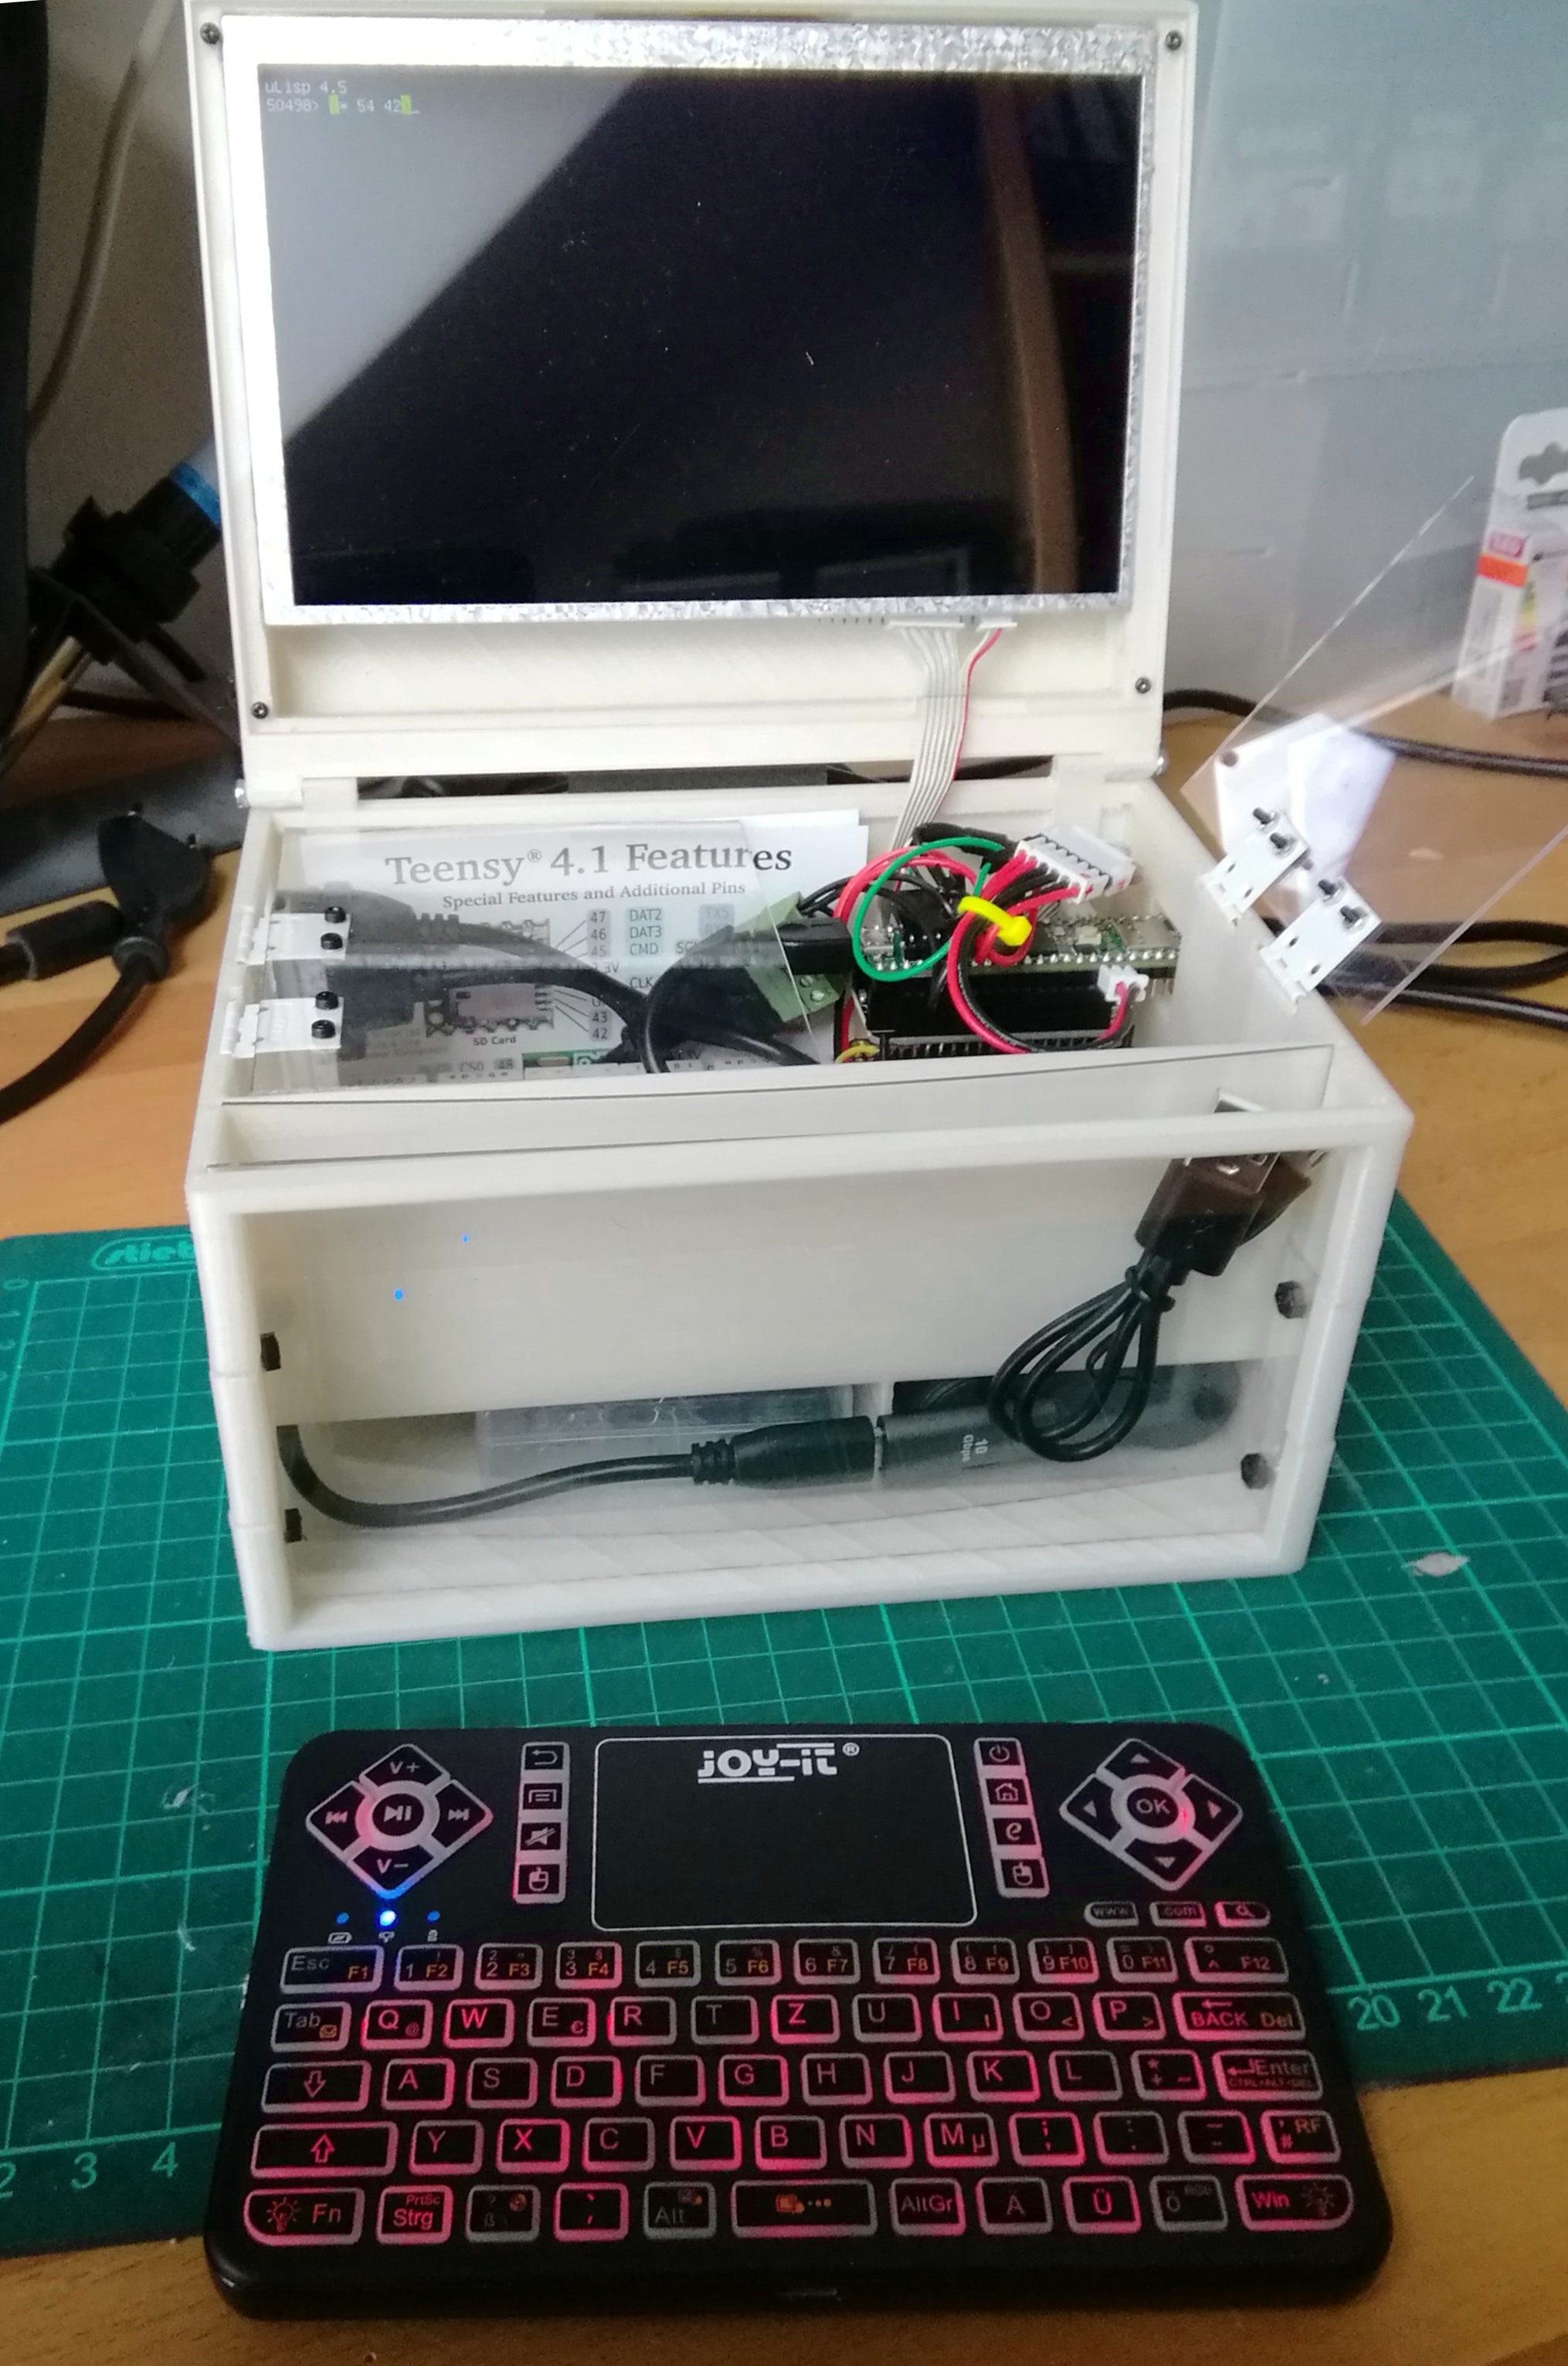
This is my version of the ultimate self-contained uLisp computer. No rocket science, though: Just the incredibly capable Teensy 4.1 running a modified version of the uLisp T-Deck firmware together with an 800x480 screen controlled by an RA8875 driver board.

The eye-friendly sized 7" screen offers 100 x 30 characters and hardware scrolling, the Teensy adds USB host support, i.e. support for a standard USB keyboard. I opted for a wireless mini-keyboard that fits into the front compartment of the box, but any other keyboard may be plugged in as well. Data exchange is easily possible thanks to the built-in SD card socket of the T4.1, but the standard serial connection is there as well, of course.

Since the Teensy offers more than one SDI port (actually “more than one” for just about any interface), it should be possible to connect a second screen for experimentation purposes. That’s the whole point of this rather blocky but functional box: Inside there are two half-size breadboards, and the Teensy sits on a Feather adapter that is plugged into the Feather tripler. Below ground level there’s a battery offering at least estimated 10 hours of uptime and a little box with common electronics components. Tinkering galore with 600 MHz, if I may say so.

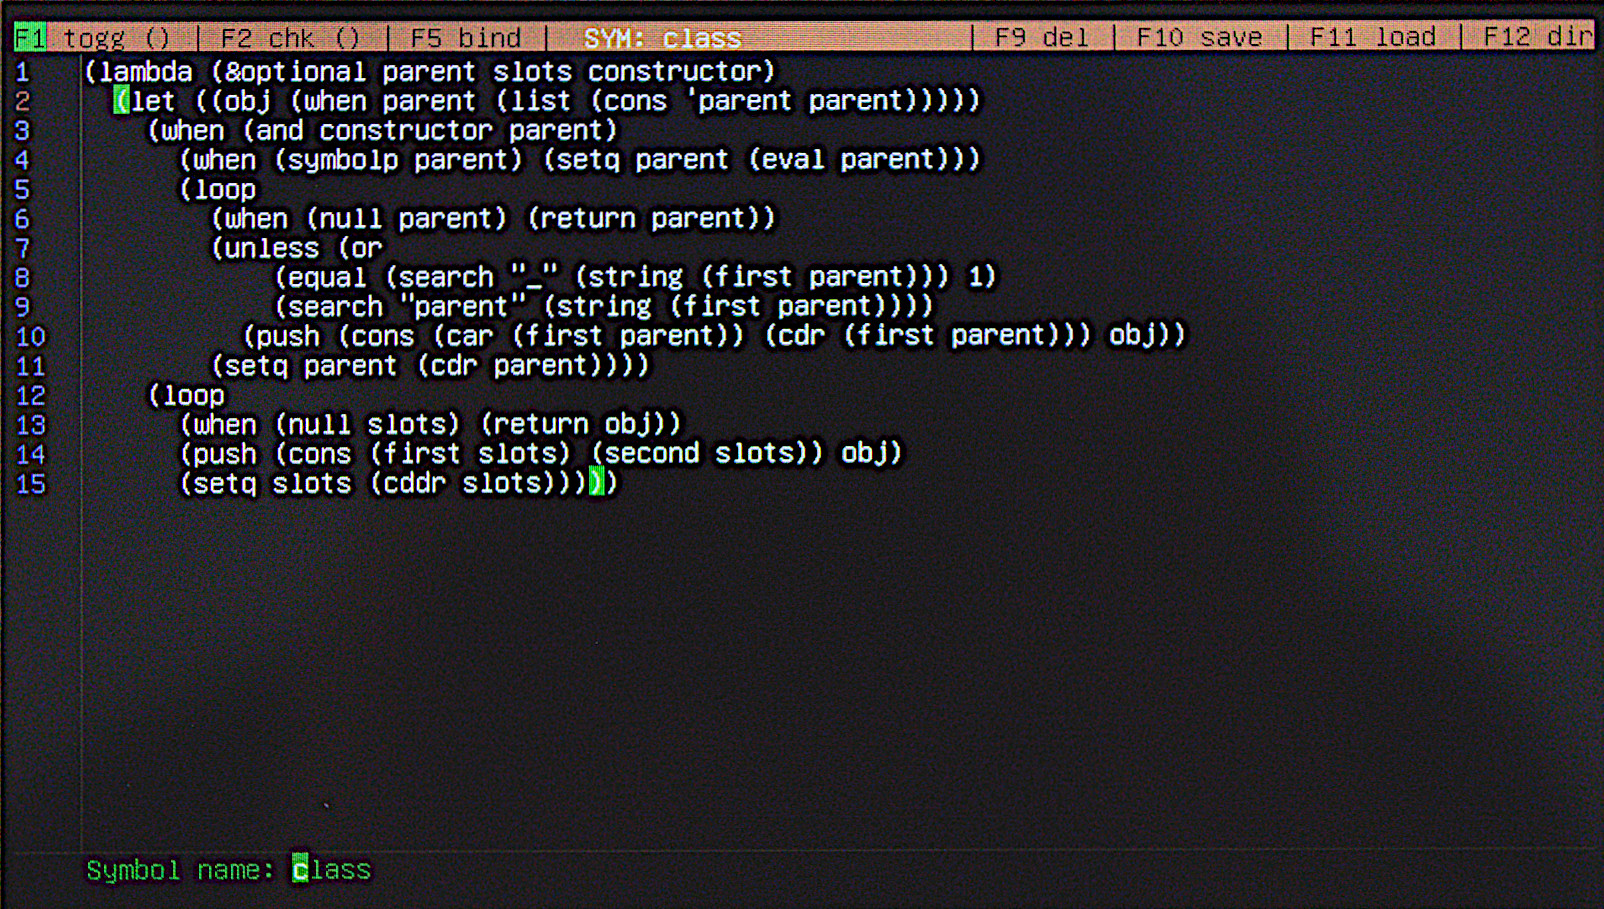
I will post the firmware and the 3D print files as soon as I have tidied things up. I also want to develop a simple screen oriented uLisp editor to make adequate use of the large screen and the comfortable keyboard. The RA8875 even offers a blinking cursor which will come in handy.

In the rather short period of time of my acquaintance with uLisp I’ve somewhat fallen in love with it and decided to make it my primary MCU development platform. The LispBox is intended to resemble the hands-on feeling of old home computers - a barebones system that fires up in 6 seconds and can be explored and understood down to the registers. But unlike the old BASIC machines uLisp offers instant comfortable support of all kinds of peripheral devices, and unlike some other “retro feeling” approaches screen size and keyboard make it really usable on a regular basis. A dream has come true.


#2

Hi Ginkgo ,

Looks great ! What is the keyboard your using ? Looks cool , what interface does it support ?
Waiting patiently for schematics of the beast ! I own a T4.1 , but it’s just gathering dust at this moment …
Regards,
Ronny


#3

Hi Ronny,

the keyboard is this one:
https://joy-it.net/en/products/TASTAMINI01
Schematics won’t be necessary since there aren’t too many connections to make it work.
The screen controller is this one:
https://www.adafruit.com/product/1590
I use it with this screen (there’s a touch screen version as well):
https://www.adafruit.com/product/2353

There are other RA8875 boards available, also many other screens that work with it. The board listed above can be driven by 5V or 3V, there are level shifters, so there are several options to power it and they will all work with the Teensy.

To control the screen I use the Teensy’s SPI port 1 (pins 26,27,38,39 plus another arbitrary pin for RST (screen controller’s reset line)). To make that work it’s necessary to initialize SDI1 with the pin numbers.

There are a few other modifications to the T-Deck firmware because of the bigger screen and hardware scrolling - I will put that into a GitHub repository. I decided to use the Adafruit RA8875 library although there’s a “Teensy version” as well, because the latter looks much more complicated and isn’t directly compatible (concerning the class/method/function structure) to the T-Deck uLisp firmware that relies on the Adafruit GFX command structure. I modified the Adafruit RA8875 library a little, though, since screen rotation isn’t fully implemented in this driver and uses the wrong method. Seems like sales of the RA8875 aren’t too great compared to other controllers so Adafruit hasn’t looked into this driver too much anymore after the initial release.

The SD card slot on the 4.1 board uses its own fast internal connection which is supported “out of the box” by uLisp.

To make the external keyboard work you need the “USB host t36 library”. Looks terribly complicated at first glance but actually is dead simple to use and works just great. The USB host port is connected to the dedicated interface on the board, of course, just needs five pins to be soldered on and a suitable cable.

That’s it for now - I will have to invest a little more work before I can make the whole thing available publicly because it needs to be documented thoroughly, and the 3D files for the case need some modifications.