Using uLisp on the Adafruit Neo Trinkey


#1

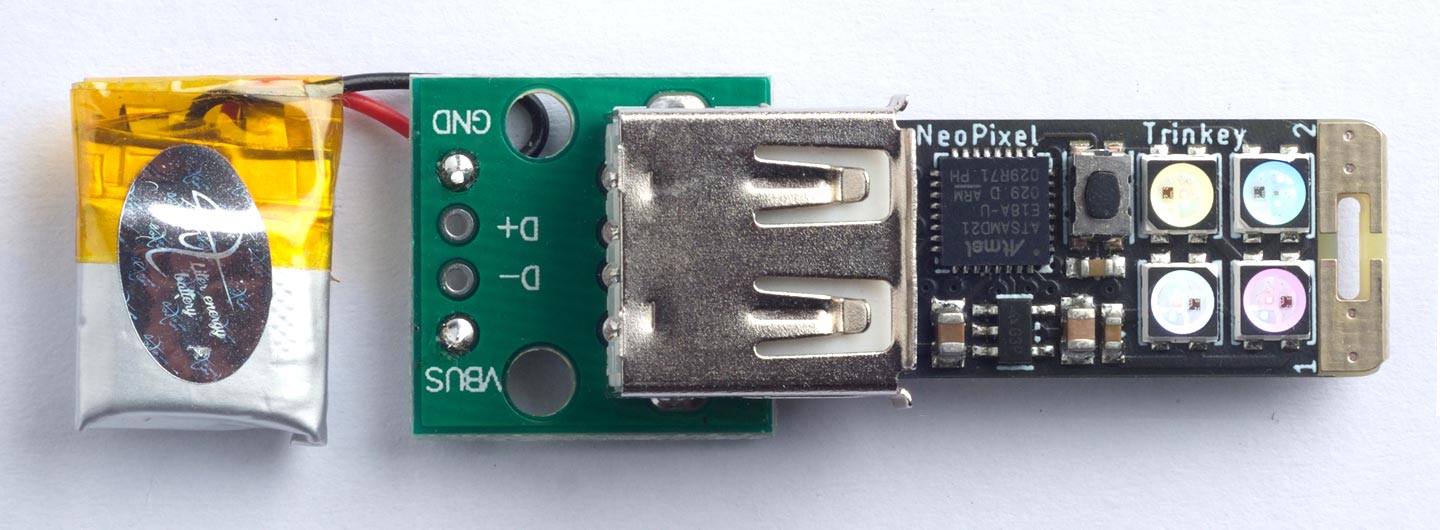
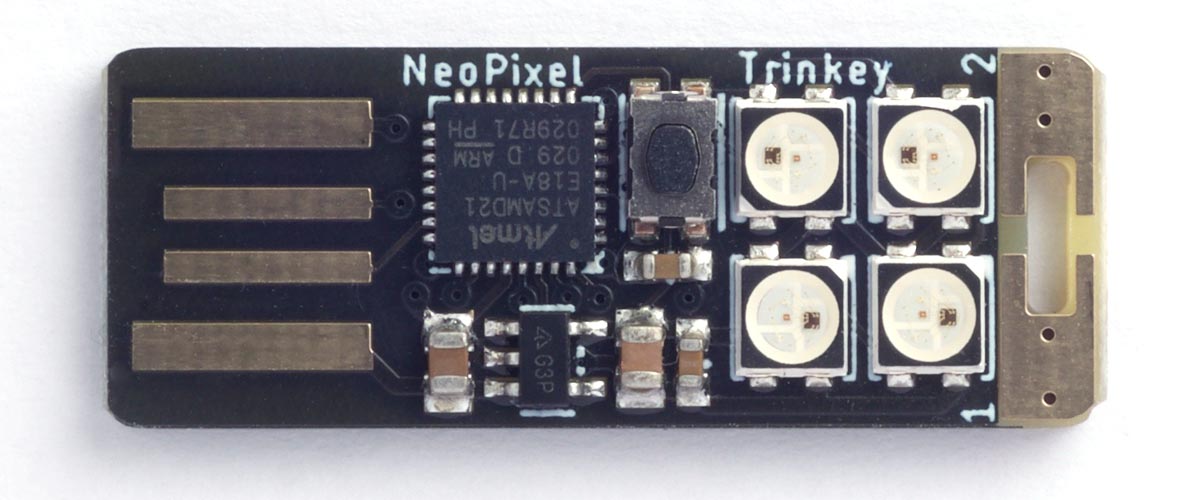
The Neo Trinkey is a USB-key sized board from Adafruit containing an ATSAMD21 ARM M0+ chip running at 48MHz, and four NeoPixel WS2812 serial addressable RGB displays:

For more information see:

Adafruit Neo Trinkey - SAMD21 USB Key with 4 NeoPixels

Installing uLisp on the Neo Trinkey

To install the ARM version of uLisp on the Neo Trinkey choose the Adafruit Gemma M0 board setting in the Adafruit SAMD Boards core. The performance is similar to the other M0 boards.

Having got uLisp running I thought it would be interesting to use the uLisp ARM assembler to write a routine to control the four NeoPixel displays.

Installing the assembler

The assembler itself is written in Lisp to make it easy to extend it or add new instructions. For example, you could write assembler macros in Lisp as shown below. For more information see: ARM Assembler Overview

Get the assembler here: ARM assembler in uLisp. To add it to uLisp: do Select All and Copy, Paste it into the field at the top of the Arduino IDE Serial Monitor window, and press Return .

Controlling the NeoPixels

NeoPixels use a non-standard protocol consisting of a serial stream of pulses, and the width of each pulse determines whether it is a ā€˜0ā€™ or a ā€˜1ā€™:

Here is a table showing the number of clock cycles that each of these timings correspond to with the 48MHz clock on the Neo Trinkey. All the timings have a tolerance of Ā±150 ns:

Time Cycles
T0H 350 ns 16.8
T0L 800 ns 38.4
T1H 700 ns 33.6
T1L 600 ns 28.4

The colour for each NeoPixel display is specified by a stream of 24 bits:

The following assembler routine lets you control the four displays on the Neo Trinkey by calling the routine with four parameters, each specifying the colour of one display. For example, to set the displays to yellow, cyan, magenta, white:

(neopixel #x070700 #x070007 #x000707 #x070707)
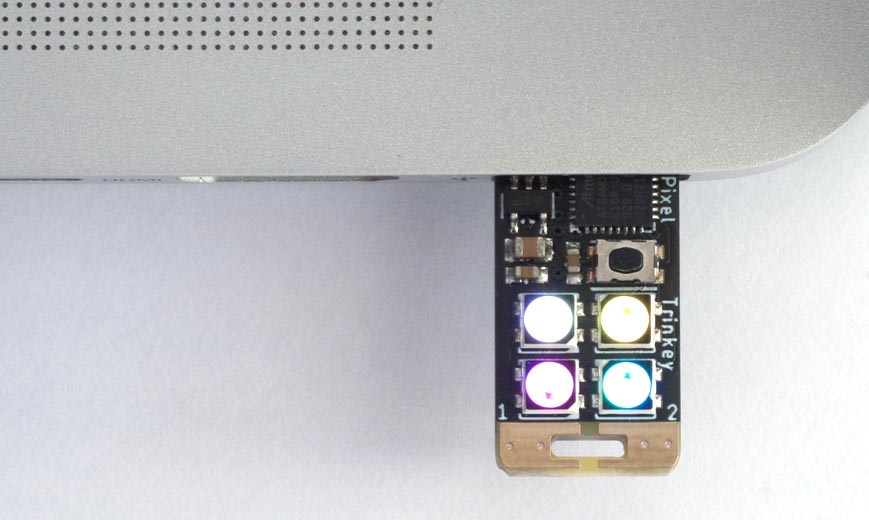
Iā€™ve purposely kept the displays at a low brightness because at full brightness they can be a bit dazzling.

Delay macro

The key section of code in all these routines is a delay4 macro written in Lisp. This generates a list of the instruction words which will be inserted in the assembler at the appropriate point to get a delay of n clock cycles:

(defun delay4 (n)
  (list
   ($mov 'r5 n)
   ($sub 'r5 1)
   ($bne (- *pc* 2))))

This uses r5 as a counter to execute the loop a number of times, specified by the constant n specified in the parameter, and the total execution time is n * 4 cycles.

Assembler routine

On the Neo Trinkey the chain of four NeoPixel displays are connected to PA05. The base address of Port A is #x41004400, and offsets from this give access to the dirset, outset, and outclr registers to define a pin as an output, set a pin high, and set a pin low respectively. These are defined by the following defvar statements:

(defvar dirset #x08)
(defvar outset #x18)
(defvar outclr #x14)

Finally, hereā€™s the whole assembler routine:

(defcode neopixel (a b c d)
  ($push '(lr r5 r4 r3 r2 r1 r0))
  ($ldr 'r4 porta)
  ($mov 'r1 1)
  ($lsl 'r3 'r1 5)
  ($str 'r3 '(r4 dirset)) ; make pin an output
  ($mov 'r2 4)
  nextled
  ($pop '(r0)) ; get bytes
  ($mov 'r1 1)
  ($lsl 'r1 23)
  nextbit
  ($tst 'r0 'r1) ; test if bit is 1
  ($bne one)
  zero
  ($cpsid 3)
  ($str 'r3 '(r4 outset))
  (delay4 4)             
  ($str 'r3 '(r4 outclr))
  (delay4 10)
  ($cpsie 3)
  ($b next)
  one
  ($str 'r3 '(r4 outset))
  (delay4 8)
  ($str 'r3 '(r4 outclr))
  (delay4 7)
  next
  ($lsr 'r1 1)
  ($bne nextbit)
  ($sub 'r2 1)
  ($bne nextled)
  ($pop '(r4 r5 pc))
  porta
  ($word #x41004400))

The four parameters are passed to the assembler routine in r0, r1, r2, and r3. The routine accesses these by pushing them all to the stack, and then popping them off one at a time as they are needed. I also pushed r4 and r5 as I used these in the routine.

The bits in each parameter are tested one at a time, and then the appropriate code at the labels zero or one is executed to generate a pulse with the appropriate timing.

Interrupts are disabled around the most time critical part of the routine, which generates the ā€˜0ā€™ pulse, to prevent them for affecting the pulse timings.

You can write programs in uLisp to call the neopixel routine and generate animated colour displays.

Updates

29th April 2021: Changed the name of the macro to delay4 to avoid a conflict with the built-in uLisp function delay.

5th May 2021: Added $cpsid and $cpsid instructions to disable interrupts around the most time-critical part of the routine, which generates the ā€˜0ā€™ pulse, to prevent them for affecting the pulse timings when you animate the NeoPixels.


Run uLisp on a USB dongle
#2

These are about US$6.95. Iā€™ve ordered a couple and weā€™ll look at them when they arrive, probably next week.


#3

Interesting. As a proof of concept I changed the code to work with a different pin and got it to work on a Circuit Playground Express - which has ten pixels. (It uses the same chip as the ItsyBitsy M0, and has the two megabyte flash, so was trivial enough to compile for.)

Iā€™ll need to mess with it a little more to use the lot of them. :)


#4

Glad to hear it works on that! With ten NeoPixels you will probably want to go for the list approach I took with the AVR version:

NeoPixel driver using assembler


#5

FYI, there is a board selection for the Neo Trinkey in Arduino 1.8.13 but the ulisp-arm code
will not compile, bailing out with:
ulisp-arm:173:2: error: #error ā€œBoard not supported!ā€
173 | #error ā€œBoard not supported!ā€
| ^~~~~

    -Rusty-

#6

Yes, I havenā€™t added a board definition for the Neo Trinkey to uLisp yet, but the Adafruit Gemma M0 board setting is almost identical, so use that one.


#7

Yeah. Just thought Iā€™d try it and see what happens. :)


#8

Looking good! Received three of the little buggers this afternoon.
Definitely donā€™t turn on the LEDs full brightness!! Well, if youā€™d like
to keep your ability to SEE! Spiffy! Will play more after supper.
Thanks!

    -Rusty-

#9

The latest version of ARM uLisp, Version 3.6b, now lets you save the workspace to the Neo Trinkeyā€™s flash memory using save-image. So you can save the ARM assembler and neopixel routine, and have it available when you next connect power.

This also lets you create a Lisp program that runs automatically when you connect power, as described below:

Creating animated displays

You can write programs in uLisp to call the neopixel routine and generate animated colour displays. For example, the following function animate takes a list of four colour definitions, and cycles them around the four displays repeatedly:

(defun animate ()
  (let ((lst '(#x000707 #x070707 #x070700 #x070007)))
    (loop
     (eval (cons 'neopixel lst))
     (delay 200)
     (setq lst (append (cdr lst) (list (car lst)))))))

Making the animation run automatically

You can use uLispā€™s autorun feature to make the animate program run automatically when power is applied to the Neo Trinkey.

  • Uncomment the compile option:

    #define resetautorun
    
  • Upload uLisp (ARM Version 3.6b or later) to the Neo Trinkey board.

  • Copy and paste in the Lisp definitions for the ARM Assembler.

  • Copy and paste in the Lisp definitions for the neopixel routine and animate .

  • Check that animate works, and then type a ā€˜~ā€™ to escape.

  • Save the Lisp image with the command:

    (save-image 'animate)
    
  • Unplug the Neo Trinkey, and then plug it in again.

The animate program should run automatically.

Powering the Neo Trinkey from a LiPo cell

Iā€™ve made a dongle from a USB socket breakout board that lets you power the Neo Trinkey from a rechargeable LiPo battery:

Note: Do not attempt to recharge the LiPo cell from the 5V USB power; you need a specialised LiPo charger.


#10

This is amazing! Do you know how to read the two Capacitive Touch-pads?


#11

From AdaFruit:
On the end of the board, opposite the USB connector, are two capacitive touch pads , labeled 1 and 2 .

To use with CircuitPython, address touch pad 1 as board.TOUCH1 and touch pad 2 as board.TOUCH2 .

To use with Arduino, address touch pad 1 as 1 and touch pad 2 as 2 .

Is this easily accessible to uLisp?


#12

To use the touch pads you would need to extend uLisp with a function to use Adafruitā€™s FreeTouch library. The C code to do it is here:

Adafruit Neo Trinkey - Keyboard Example

Advice on extending uLisp is here:

Adding your own functions

Perhaps someone on this forum has already done it?


#13

Capacitive Touch works! ā€¦but with a big terrible caveat.

@johnsondavies please review my Trinkey User Extension code here and let me know how you prefer functions to work.

;; no args it returns a list of both cap touch devices
> (read-touch)
(547 789)

;; an argument it returns the value of the respective device
> (read-touch 1)
547

;; an argument it returns the value of the respective device
> (read-touch 2)
789

;; are either being touched?
(apply max (read-touch))

;; test loop
(loop (format t "QT1: ~a  QT2:~a~%" (read-touch 1) (read-touch 2)) (delay 100))

;; on error it rerturns 0
> (read-touch)
ERROR: Failed to start QT
(0 0)

> (read-touch 89)
0

> (read-touch 1 2 3)
0

Now the caveat which I feel is important because there are a lot of new variants of the Adafruit Trinkey line and they work in a similar manner.

When it comes to the Adafruit NeoPixel Trinkey, uLisp is designed to work with the hardware via the Arduino board configuration: ā€œAdafruit Gemma M0 (SAMD21)ā€. Works great, neopixel lights are eye-opening and awesome.

However, the two capacitive touchpads do NOT work with the ā€œAdafruit Gemma M0 (SAMD21)ā€ board.

Capacative touchpads only work with the ā€œAdafruit NeoPixel Trinkey M0 (SAMD21)ā€ board, at least with the Adafruit demo but uLisp wonā€™t.

Note the matrix:

uLisp Lights Touchpads
Gemma Board yes yes NO
NeoPixel Board NO yes yes

I managed to hack up the Arduino ā€œAdafruit NeoPixel Trinkey M0 (SAMD21)ā€ to get uLisp running on it, along with the lights and touchpads! It was ugly, but I went through compiling and copy/pasting Arduion code and headers from the Gemma board to the NewPixel board. It was mostly header defs for missing wire and serial functionality. Surprisingly it works.

Now, whats the right way (or at least a better way) to do this?

The Adafruit board hacks are here, and I guessed at the number of SPI interfaces setting it to 1.


#14

Yes, I agree that it would be better to use the Adafruit NeoPixel Trinkey M0 (SAMD21) board option with the NeoPixel Trinkey, but I encountered problems because the NeoPixel Trinkey doesnā€™t support some of the interfaces that uLisp assumes are available. Specifying that you should use the Adafruit Gemma M0 (SAMD21) board option was a quick fix.

Iā€™ll have another look at whether I can get it working with the standard board file.


#15

Iā€™m only running the Trinkey/Gemma franken-board with the following options:

#define resetautorun
#define printfreespace
#define assemblerlist
#define extensions

It also happens to pass the test suite, FYI there is an extraneous ā€˜xā€™ in the atan test, I canā€™t find it on github.


#16

FYI there is an extraneous ā€˜xā€™ in the atan test

Thanks, fixed.